Joy takes shape in this Crochet Amigurumi Chick Pattern, featuring an adorable, easy-to-stitch design perfect for gifts and cheerful decor.
Adorable Crochet Amigurumi Chick Pattern for Spring Vibes

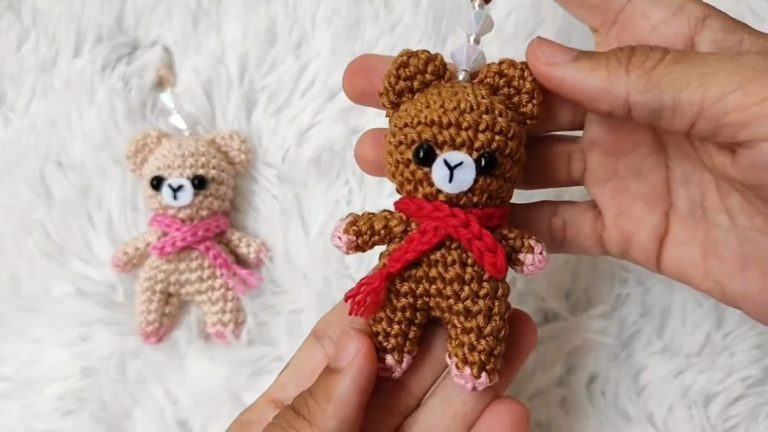
Delightfully soft and irresistibly cute, crocheted amigurumi chicks serve as wonderful gifts, decorations, or collectibles. These charming handmade creations are loved for their small, whimsical appearance, making them perfect for seasonal décor like Easter or just a cheerful addition to a living space. Amigurumi projects like this not only showcase your skill but are highly rewarding for reducing stress and sparking joy. When crocheting a chick, the process focuses on simple yet effective techniques to bring the design to life piece by piece.
Materials
The pattern likely involved either crocheting, décor, or personal use items. Depending on the project, the materials might include:
- Yarn, thread, or fabric for crocheting/pattern-based pattern.
- Tools: Crochet hooks, needles, scissors, markers.
- Optional items: Embellishments like beads, buttons, ribbon.

As an outcome, this crochet amigurumi chick can be a heartfelt gift, a decorative charm for keychains, or a playful addition to a child’s room. Its simple yet effective process makes it beginner-friendly, while still holding enough creative potential for personalization.

The initial steps involve starting with a magic ring, a technique central to amigurumi creations. From there, single crochet stitches are used to gradually shape the chick’s round, fluffy body.


Increases are incorporated at timed intervals to give the structure a smooth and consistent form, while the rounds continue without interruption to establish a seamless finish.


The middle and final phases involve stuffing the body to achieve the proper fullness and completing the project by securely joining all parts.
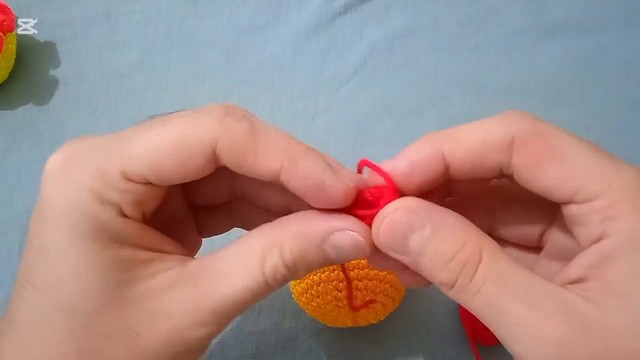

The project moves on to designing the wings, tiny feet, and the adorable beak, typically crocheted separately and attached later with slip stitches. Special emphasis is placed on detailed elements, like sewing expressive eyes or customizing features with colors or accessories, which add personality to your chick.

Step-by-Step Details: Part 1
Introduction:
-
- Explanation of the overall project (e.g., crafting, sewing, DIY item).
- Benefits and uses of the finished product.
Foundational Techniques:
-
-
- Demonstration of key skills required for the project (e.g., basic stitches, patterns, or assembly).
- Guidance for beginners to practice these techniques before moving forward.
-
Starting the Project:
-
-
-
- Step-by-step instruction to begin the project (e.g., foundation rows, creating a base pattern).
- Tips for avoiding common mistakes during this phase.
-
-
Special Features of Part 1 & Part 2
- Breakdown of fundamental techniques for beginners.
- Clear focus on preparation and skill development before diving into the more complex aspects.
- Encouragement to take your time and master foundational steps.
Part 2
- Focus on refining the project and ensuring a polished finish.
- Suggestions on customization to make the item unique to your style or preferences.
Level of Difficulty
Based on the progression from part 1 to part 2:
- Part 1: Beginner-friendly, focused on learning and preparing.
- Part 2: Intermediate, requiring patience and attention to detail.
Tutor’s Suggestions
The instructor likely emphasizes:
- Practice Makes Perfect: Revisit earlier steps if a technique is unclear.
- Take Breaks: Avoid rushing and give yourself time to process instructions.
- Double-Check Progress: Ensure you’re following the pattern or plan correctly.
A Handy Tip
Whenever tackling a project broken into two parts, complete part 1 before viewing part 2. Ensure you’ve mastered the foundational techniques and steps before moving forward, reducing confusion and mistakes.
Part 1 & 2: Introduction
The first part of a tutorial often serves as the foundation of the project. It introduces the idea, demonstrates essential techniques, and prepares the materials for execution. This phase is crucial for laying out the groundwork for successfully completing the project.
The second video typically continues from where the first left off, diving into the intermediate to advanced portions of the project. It includes adding details, refining the outcomes, and completing the final product.
Conclusion
These two-part tutorials are an excellent way to learn a new skill or project, breaking tasks into manageable steps. By following the instructions carefully, you’ll gain confidence and expertise, ultimately creating something unique and meaningful. Whether for personal use or gifting, this pattern provides valuable techniques to strengthen your abilities.