Tiny whiskers and tails charm with this Crochet Mouse Amigurumi Pattern that’s perfect for cute gifts, décor, and playful fun.
Handmade Crochet Mouse Amigurumi That Feels Magical

A tiny yarn companion slowly takes form, a little mouse that carries charm and character in every stitch. This crochet mouse amigurumi brings a touch of whimsy to any space, whether perched on a shelf, tucked beside a favorite book, or held as a comforting toy. Its soft texture and compact size make it perfect for gifting, collecting, or adding a playful accent to everyday surroundings.
Materials You’ll Need:
- Crochet Hook: 2.5mm
- Yarn:
- White yarn for the body
- Light pink yarn for ears and tail
- Yellow yarn for the cheese
- Stuffing: Sintepon or fiberfill
- Eyes: 2 black beads (4mm)
- Accessories: Black thread for whiskers, needles, scissors, and a pink pencil for cheek coloring.

The appeal of this mouse lies in its carefully shaped features: rounded ears, a delicate tail, and expressive eyes that give it a lively personality. Working with soft, durable yarn and a standard crochet hook, the pattern combines simple stitches such as single crochet and strategic increases to build a smooth, textured surface. Each detail enhances the overall charm, producing a piece that is approachable for beginners yet satisfying for experienced crocheters seeking a playful, detailed result.
Beyond its visual charm, this amigurumi encourages patience and focus, offering a fulfilling sense of accomplishment once complete. It serves as a delightful toy, a collectible, or a thoughtful gift that brings warmth and character to any environment.
Step-by-Step Details
Step 1: Crocheting the Ears
- Pink Ear:
- Start with a magic ring.
- Crochet 1 single crochet (sc), 4 double crochets (dc), and then 1 single crochet (sc) into the ring.
- Tighten the ring and cut the working yarn. Set the pink ear aside.
- White Ear:
- Make a second ear following the same steps as the pink ear, but without cutting the yarn.
- Turn the work.
- Add the pink ear piece to the white one and crochet the two parts together. Alternate loops while combining them:
- Insert the hook into the first pink loop, then into the corresponding white loop.
- Work single crochets (sc) across the connected edges, doubling the stitches in areas with double crochet loops.
- Finish by cutting the yarn and making another ear following the same steps.
Step 2: Crocheting the Body
- Foundation:
- Begin with a magic ring using white yarn.
- Crochet 6 single crochets (sc) into the ring and tighten it.
- Body Shape:
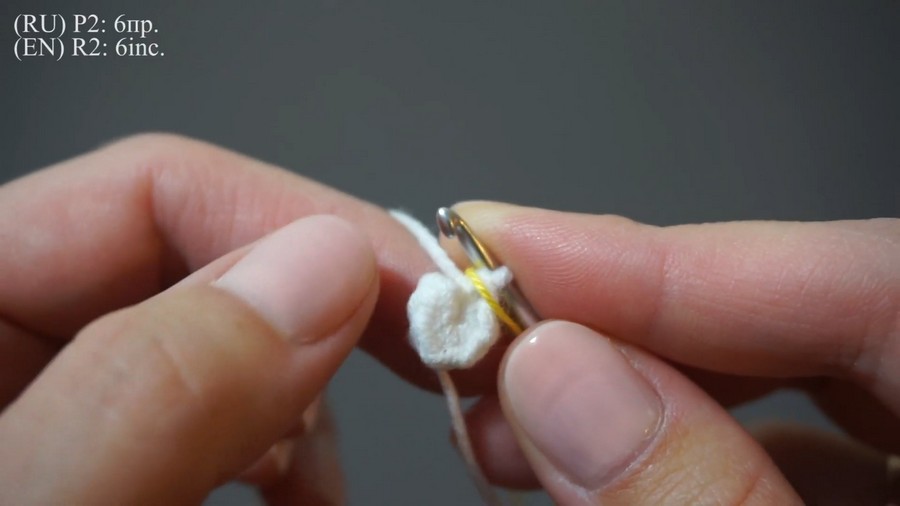
- Row 2: Work 6 increases (inc) — 2 sc into each loop (total: 12 stitches).
- Row 3: Alternate 1 single crochet (sc) and 1 increase (inc) six times.
- Row 4: Alternate 2 single crochets (sc) and 1 increase (inc) six times.
- Rows 5–13: Crochet 24 single crochets (sc) per row to build the mouse’s body.
- Face Details:
- Attach the eyes between Rows 5 and 6, leaving 3 loops between them. Secure the beads with thread and cut off the ends.
- Add a nose with pink yarn between Rows 7 and 8. Shape the nose into a tiny triangle using stitches and add a thin line for detail.
- Cheeks and Whiskers:
- Use a pink pencil to lightly paint cheeks on both sides of the nose, leaving one row of unpainted space between the cheeks and nose.
- Embroider black thread whiskers starting from the second row below each eye, creating three symmetrical stitches.

3: Attaching the Ears
- Sew the ears onto the head. Align the centers of the ears with Row 3.
- Attach one edge 2 rows above the center and the other edge 2 rows below. Secure and tie off the ends, hiding them inside the toy.
4: Shaping the Body
- Row 14: Alternate 1 single crochet (sc) and 1 decrease (dec) eight times.
- Row 15: Perform 8 decreases (dec) in total.
- Stuff the toy with sintepon before closing the bottom. Secure the hole by stitching through the front loops in a circular pattern.

5: Making Paws
- Crochet each paw by starting with 3 chains (ch) and working 2 single crochets (sc) into the second loop from the hook. Cut the yarn and pull through the ends.
- Make 4 paws in total and sew them symmetrically onto the body. Attach two paws near the bottom and two slightly higher in position.

6: Crocheting the Tail
- With pink yarn, chain 15 stitches and straighten the tail by sewing it onto the mouse’s body near the bottom paws.
- Hide any loose ends inside the toy.
7: Adding a Cheese Accessory (Optional)
- Begin with a magic ring using yellow yarn.
- Work the following pattern:
- Row 1: 2 single crochets (sc).
- Row 2: Turn, chain 1, and work 2 sc.
- Row 3: Turn, chain 1, 2 sc into the first loop, and 1 sc into the second.
- Row 4: Turn, chain 1, 2 sc into the first loop, and 2 sc into the second loop.
- Sew the cheese to the toy and tie knots into the corner for shaping.

Special Features
- One-Piece Body: The mouse’s body seamlessly integrates its parts, minimizing sewing.
- Painted Cheeks & Embroidered Details: Adding embellishments gives the toy a lively, expressive face.
- Cheese Accessory: A fun touch that makes the project great for festive decorations or novelty gifts.
Level of Difficulty
The pattern is beginner-friendly, with gradual steps for the structurally simple toy. However, knowledge of basic crochet techniques like magic rings, increases, decreases, and single crochets is necessary. For absolute beginners, Ina recommends reviewing simpler crochet pattern before starting.
Tutor’s Suggestions and Uses
Ina suggests using the toy as holiday decorations, gifts, or even ornaments for a Christmas tree by attaching a thread or loop. She advises experimenting with different yarn colors for customization while keeping the basic structure unchanged.
Helpful Tip
When creating the ears, ensure tight stitches when joining the pink and white yarn pieces to prevent gaps. Additionally, keep stitches symmetrical to avoid uneven shapes when attaching paws and the tail.
Conclusion
Crochet mouse tutorial offers a festive, beginner-friendly project that allows for creative customization. Whether you’re making a holiday gift, a decoration, or simply indulging in a fun crochet session, this pattern is sure to impress.