Cuddle up with this Free Crochet Piggy Amigurumi Pattern, perfect for adding charm to shelves, desks, or as a sweet and playful collectible.
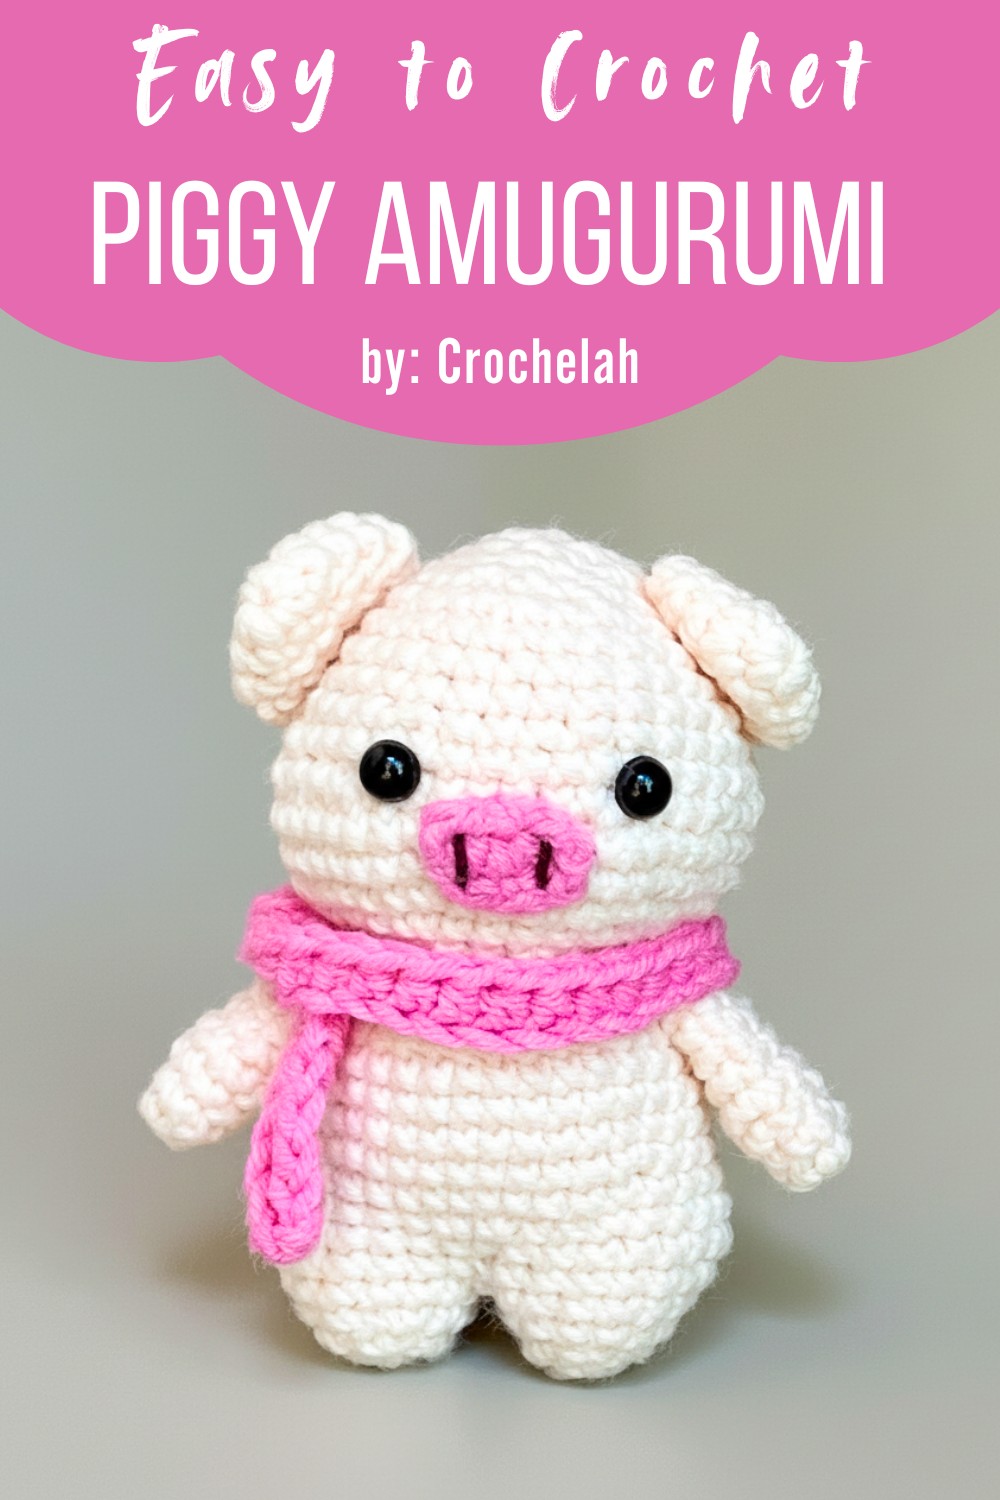
Sweet Crochet Piggy Amigurumi Pattern for Handmade Fun
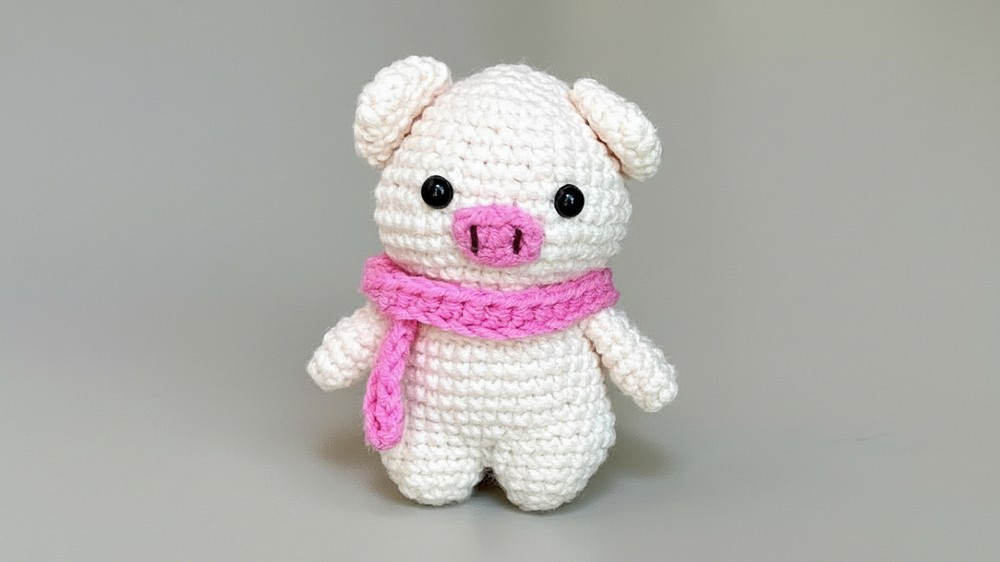
Soft, adorable, and full of charm, a crochet piggy amigurumi is the perfect blend of cuteness and creativity. This handmade plushie is not only a fun decor piece but also a thoughtful handmade gift for loved ones of all ages. Its sweet little features, like the round snout, floppy ears, and tiny curled tail, bring a lovable character to life. You can customize it with different yarn colors, accessories like bows or hats, or even make it part of a themed collection!
Crocheting a piggy amigurumi is a fun and rewarding project, perfect for beginners and experienced crafters alike. This step-by-step guide will walk you through creating a sweet little piggy with a scarf, making it a perfect addition to your collection or a thoughtful gift for any animal lover.
The pattern is easy to follow, with clear instructions for every piece, including the body, head, arms, legs, and ears. Customize the piggy with different yarn colors or add a unique touch to the scarf. Whether you’re looking for a cozy addition to your crochet family or a charming gift, this piggy amigurumi is sure to bring smiles.
Materials
-
Yarn: Velvet/Chenille yarn in light pink (main body) and dark pink (nose/ears).
-
Crochet Hook: 4.0 mm or 4.5 mm (depending on your yarn weight).
-
Eyes: Two 8mm–10mm black safety eyes.
-
Stuffing: Polyester fiberfill.
-
Tools: Yarn needle, stitch markers, and scissors.
Uses and Special Features
-
Plush Texture: Using velvet yarn gives the pig a “squishy” and high-quality feel.
-
Simple Silhouette: The body and head are crocheted as one continuous piece, reducing the amount of sewing required.
-
Customizable Expression: You can adjust the placement of the eyes and ears to give your pig a unique personality.
Crochet Piggy Amigurumi
Arms (make 2)
-
R1: 6 sc in a magic ring, sl st
-
R2: ch, (inc, 2 sc) x 2, sl st [8 sts]
-
R3-R7: ch, 8 sc, sl st [8 sts]
-
Cut the yarn and tie off.

Legs (Right and Left)
Left Leg
-
R1: 6 sc in a magic ring, sl st
-
R2: ch, 6 inc, sl st [12 sts]
-
R3: ch, 12 sc, sl st [12 sts]
-
R4: ch, (inc, sc) x 3, 6 sc, sl st [15 sts]
-
Cut the yarn and tie off.
Right Leg
-
R1: 6 sc
-
R2: 6 inc [12 sts]
-
R3: 12 sc [12 sts]
-
R4: 6 sc, (sc, inc) x 3 [15 sts]
-
Do not cut the yarn.

Body
-
R5: ch, (inc, sc) x 5, 10 sc, (inc, sc) x 5, 5 sc [40 sts]
-
R6: 24 sc (12 sc on each leg)
-
R7: 5 sc, inc, 15 sc, 2 inc, 15 sc, inc, 5 sc, sl st [44 sts]
-
R8: ch, 7 invdec, 20 sc, 7 invdec [34 sts]
-
R9: ch, sc, invdec, 9 sc, invdec, 8 sc, invdec, 9 sc, sl st [34 sts]
-
R10: ch, invdec, 30 sc, invdec [32 sts]
-
R11: ch, 6 sc, invdec, 16 sc, invdec, 6 sc, sl st [30 sts]
-
R12-R13: ch, 30 sc, sl st [30 sts]
-
R14: ch, (3 sc, invdec) x 6, sl st [24 sts]
-
R15: ch, 24 sc, sl st [24 sts]
-
Sew the arms between rounds 14 and 15, then stuff the body with cotton.

Head
-
R16: ch, (3 sc, inc) x 6, sl st [30 sts]
-
R17: ch, (2 sc, inc, 2 sc) x 6, sl st [36 sts]
-
R18: ch, (2 sc, inc) x 12, sl st [48 sts]
-
R19-R20: ch, 48 sc, sl st [48 sts]
-
R21: ch, (4 sc, invdec, 4 sc), (2 sc, invdec) x 3, (4 sc, invdec, 4 sc), sl st [40 sts]
-
R22: ch, 40 sc, sl st [40 sts]
-
Install the safety eyes between rounds 21 and 22, 6 stitches apart.
-
R23: ch, (3 sc, invdec) x 8, sl st [32 sts]
-
R24-R26: ch, 32 sc, sl st [32 sts]
-
R27: ch, (2 sc, invdec) x 8, sl st [24 sts]
-
R28: ch, (2 sc, invdec) x 6, sl st [18 sts]
-
Stuff the head with cotton.
-
R29: ch, (sc, invdec) x 6, sl st [12 sts]
-
R30: ch, 6 invdec, sl st [6 sts]
-
Close the remaining opening with a needle.
Ears (make 2)
-
R1: 6 sc in a magic ring, sl st
-
R2: ch, (sc, inc) x 3, sl st [9 sts]
-
R3: ch, (2 sc, inc) x 3, sl st [12 sts]
-
R4: ch, (3 sc, inc) x 3, sl st [15 sts]
-
R5: ch, (3 sc, dec) x 3, sl st [12 sts]
-
Cut the yarn and tie off.
Nose
-
Make 4 chains.
-
2 sc, 3 sc in 1, sc, inc.
-
Cut the yarn and tie off.
Assembly & Scarf
-
Sew the ears to the head on the 4th round from the top.
-
Sew the pink nose to the face.
-
Embroider the nostrils with black yarn.
-
Scarf: Chain 50, then make 48 hdc (half double crochet).

Level of Difficulty
-
Easy/Beginner: The project focuses on basic stitches (Single Crochet, Increase, and Decrease). It is an excellent project for those new to working with velvet yarn.
Tutor’s Suggestions
-
Stitch Markers: Because velvet yarn can make it difficult to see individual stitches, always use a stitch marker to keep track of the start of your rounds.
-
Tension: Keep your tension consistent so the stuffing doesn’t peek through the velvet fibers.
Conclusion
Crocheting this piggy amigurumi is a rewarding way to practice shaping and working with textured yarns. The result is a professional-looking, cuddly toy that is sure to bring a smile to anyone who receives it.
Pro Tip
When working with velvet yarn, the ends can sometimes shed. To prevent this, lightly singe the very tip of the yarn tail with a lighter (carefully!) or dab a tiny bit of fabric glue on the end before weaving it in.