Welcome cheerful vibes with this Crochet Spring Gnome Pattern, adding playful charm, festive décor, and delightful seasonal joy.
Trendy Crochet Spring Gnome Pattern for Kawaii Decor

As the first blooms of spring emerge, tiny figures seem to appear among the flowers, bringing a touch of whimsy and cheer to the season. This crochet spring gnome captures that playful spirit, offering a miniature companion that brightens shelves, tabletops, or garden corners. Its cheerful hat, rounded body, and endearing features make it an ideal decorative accent, a thoughtful gift, or a charming addition to seasonal displays.
Materials Needed
- Paper Towel/Toilet Paper Roll: Used to form the brim of the hat.
- Cotton Balls: For stuffing the hat to give it stability.
- Yarn:
- Chunky Premier yarn for the hat.
- Red Heart yarn for the body and optional braided hair.
- Scrap yarn for the flowers, hearts, or decorations.
- Wooden Bead (or alternative): Used for the gnome’s nose (you can use a button or a crocheted circle as another option).
- Scissors: For cutting yarn and trimming.
- Hot Glue Gun: Essential for attaching parts of the gnome.
- Darning/ yarn needle: For weaving in ends.
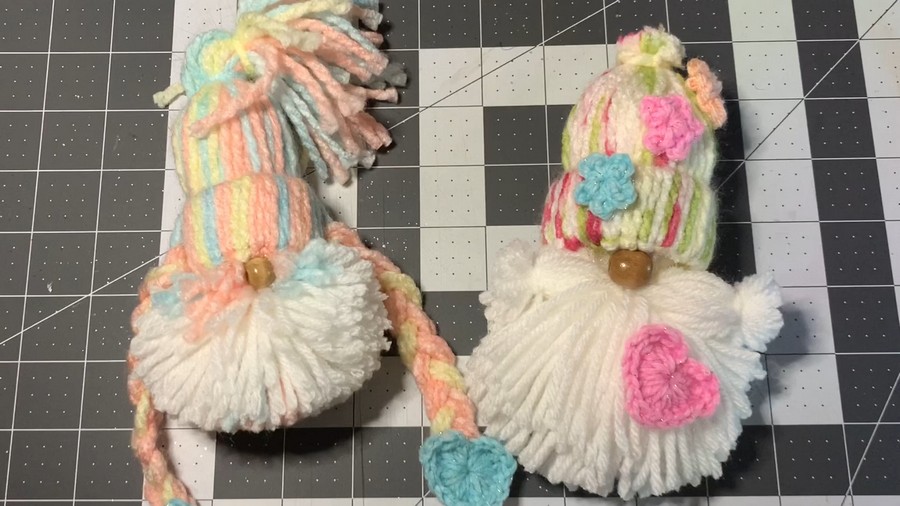
The figure stands out through its balanced proportions and intricate yet approachable details. Its upright posture, pointed hat, and tiny hands contribute to a lively and expressive presence, while soft, plush features give it a huggable quality.
Colorful accents allow for playful creativity, and the sturdy form ensures it maintains shape for display or gentle handling. The project offers a satisfying sense of accomplishment, providing moments of focus and careful attention as each part comes together.
Step-by-Step Instructions
Making the Hat
- Prepare the Base:
- Cut a paper towel or toilet paper roll to the desired thickness. Trim it to suit the width of your gnome’s hat.
- This will be used as the structure to wrap yarn around.
- Wrapping the Yarn:
- Cut 12-inch pieces of yarn. Fold each piece in half and loop it onto the roll using the following technique:
- Place the folded yarn inside the roll and pull the ends through the loop to secure it.
- Repeat the same way around the entire roll, ensuring the loops are evenly spaced.
- When the roll is fully wrapped, push the yarn loops upward to form the hat shape.
- Tie the top using a long piece of yarn. Pull it tightly to hold the shape of the hat.
- Cut 12-inch pieces of yarn. Fold each piece in half and loop it onto the roll using the following technique:
- Stuffing the Hat:
- Insert cotton balls into the hat to provide structure and help it stand upright. Make sure there are enough cotton balls to maintain rigidity without causing the yarn to spread.
- Shaping the Hat:
- For gnomes with hats pointing straight up, tie off the top neatly. Trim the extra yarn or leave it for a pom-pom-like top.
- For a slanted or drooped hat look, pull the tied yarn to the side and tie the top to keep it in place. Trim off excess yarn for a clean finish.
Creating the Gnome’s Body
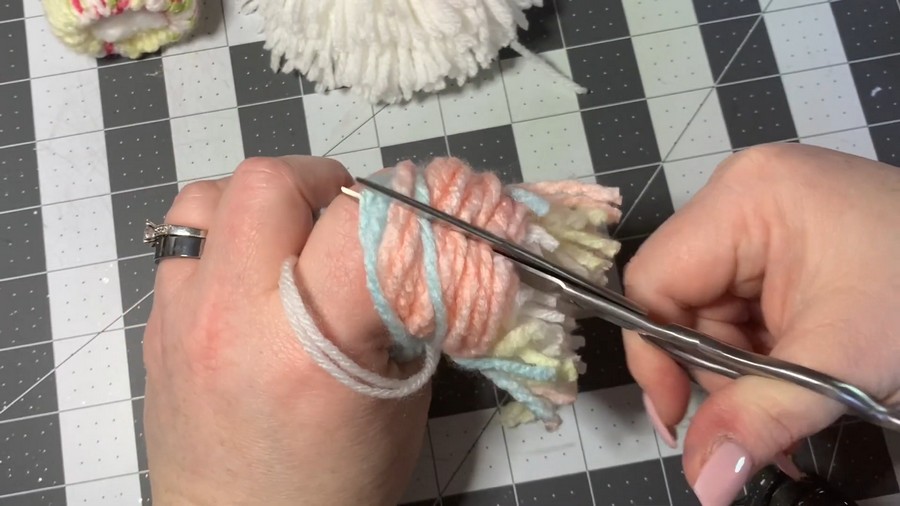
- Making the Body Puff:
- Wrap yarn loosely around your hand 90–100 times.
- Slide the yarn off your hand and tie it tightly in the middle using a separate piece of yarn. This will form the basis for the puff.
- Trim each side to create a puff or pom-pom. For a flatter puff style (like the example used in the video), flatten the pom-pom on a flat surface and shape it manually.
- If desired, add yarn pieces to create features like a mustache:
- Separate clumps of yarn and tie them into sections with white yarn to form a mustache design. Trim the strands to your preferred length to shape the mustache.
- Attach Nose, Hat, and Puff Body:
- Heat up the glue gun.
- Attach the hat to the puff body, pressing firmly until the glue sets.
- Using additional glue, attach the wooden bead (or alternative item) as the nose.

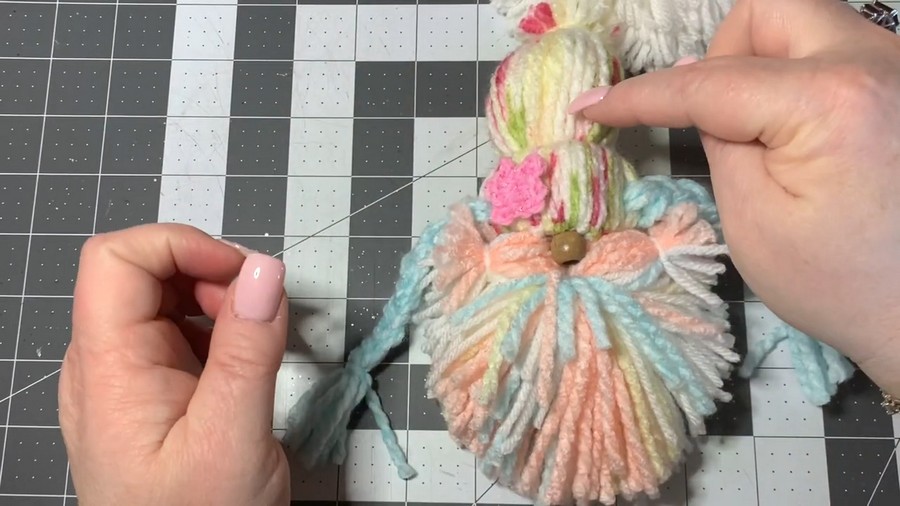
Adding Braided Hair
- Cut long pieces of yarn (four sets for each side). You can use variegated or solid color yarn for the braids.
- Fold two pieces in half and pull them through just under the brim of the hat.
- Divide each braid section into three equal parts and braid them to your desired length.
- Tie the end of the braid with a piece of yarn, trimming as needed.
Making Miniature Flowers
- Create a slip knot with scrap yarn and chain 4 stitches. Slip stitch into the first chain to form a loop.
- For each petal:
- Chain 2 inches.
- Work 1 half-double crochet in the center of the loop.
- Slip stitch again into the loop.
- Repeat these steps until you have five petals.
- Pull the yarn tightly to secure the flower and cut the yarn.
- Use your yarn needle to weave in the ends for a polished finish.
- Decorate Your Gnome:
- Use the hot glue gun to attach flowers or hearts around the hat, braid, or body. Placement is flexible based on your design preferences.

Special Features
- Beginner-Friendly: Minimal crochet techniques make this project achievable even for newcomers.
- Customizable: You can personalize your gnome with different yarn textures, colors, or shapes for decoration—flowers, hearts, beads, or buttons.
- Versatile Design: The gnomes can be used as keychains, decorations, garden accents, or gifts for various occasions.
Level of Difficulty
This project is Beginner-Friendly. It requires only knowledge of basic crochet stitches (chain stitch, slip stitch, and half-double crochet) and general crafting techniques like gluing and assembling materials. Perfect for anyone starting their crochet journey or for a quick and rewarding project for experienced crocheters.
Tutor’s Suggestions
- Use Thicker Yarn: Don recommends chunky yarn for better structure and appearance, especially for the hats.
- Stuff the Hat Well: Use enough cotton balls inside the hat to provide structure but avoid overstuffing, which could stretch or distort the yarn.
- Even Yarn Placement: When wrapping yarn around the roll and tying knots, ensure the yarn is neatly and evenly placed for a clean look.
- Be Creative: The gnomes are highly customizable—you can choose colors, create patterns, and try different decorations to make them unique.
- Patience with Details: Take your time trimming the pom-poms, tying braids, and arranging decorations to ensure a polished final product.
Uses and Applications
- Keychains: Attach a keyring to create fun accessories.
- Home Decorations: Use them as spring-inspired decor for shelves, windows, or gardens.
- Holiday Gifts: Customize them for Valentine’s Day, Easter, or other holidays.
- Craft Market: These handmade gnomes are great for selling at local fairs or markets.
Tip
When working with the yarn for the hat, make it dense and full while wrapping to avoid gaps where the cotton balls may show through. Push the loops together tightly as you work to achieve a polished look.
Conclusion
This Springtime Gnome project is a creative, fun way to brighten your home or make unique gifts. With minimal crochet skills required, it’s accessible to beginners and allows room for endless customization.


