Capture pixel-perfect charm with this Crochet Minecraft Allay Pattern, featuring playful details, creative flair, and gamer-inspired fun.
Cool Crochet Minecraft Allay Pattern Every Gamer Will Love

Legends speak of a tiny blue spirit that flutters through digital worlds, known for its gentle loyalty and shimmering glow. Inspired by this beloved companion, the Crochet Minecraft Allay pattern brings that same touch of charm into real life. Its playful yet serene character makes it a delightful addition for fans who adore both creativity and comfort. Every detail reflects the Allay’s whimsical nature—its rounded form, expressive wings, and soft, friendly demeanor radiate warmth and nostalgia.
Materials:
- Base yarn color: For the Allay’s main body.
- White yarn: For the eyes.
- Stuffing: Polyfill recommended for shaping.
- 4mm crochet hook: For the main pattern.
- 2mm crochet hook: For creating finer details such as the eyes.
- Scissors: For trimming and stuffing threads.

This handmade figure isn’t just a collectible—it’s a keepsake that symbolizes helpfulness, joy, and imagination. Perfect for decorating gaming spaces, gifting to Minecraft enthusiasts, or adding to themed collections, it captures the heart of the virtual world in tangible form. The structure offers stability while maintaining a delicate, airy appearance, and its smooth, plush feel makes it both durable and inviting.
Beyond its visual appeal, this piece brings emotional comfort—a reminder of simple joys, patience, and creativity shared between the digital and real worlds. Whether placed on a desk, shelf, or bedside table, this endearing Allay adds a soft touch of fantasy and familiarity, turning everyday moments into something just a bit more magical and meaningful.
Steps to Crochet the Minecraft Allay:
Step 1: Start with a Magic Circle
- Using the base color and a 4mm crochet hook, wrap the yarn twice around your fingers.
- Grab the string connected to the skein, twist it around, and pull through to form a loop. Adjust it carefully to ensure it holds securely but remains flexible.
Step 2: Begin the Top of the Allay’s Head
- Crochet 8 single crochets into the magic circle and pull it closed tightly. Tie 2–3 knots to secure it firmly.
- For Round 2, turn the circle into a square by starting with a single crochet and following it up with a triple increase (three single crochets into one stitch) to create corners. Alternate between single crochets and triple increases to create the square shape.
- Round 3: Expand further by following the pattern of 2 single crochets, 1 triple increase, then 3 single crochets, followed by another triple increase at each corner. End with balanced single crochets.
- Repeat the expanding pattern for two additional rounds, increasing the single crochet count between corners by two stitches each time. The square should now have clearly defined corners.

3: Build Downward to Shape the Head
- In the next round, work only into the back loops. Crochet single crochets all around without increases or decreases.
- For the next eight rounds, work single crochets into both loops, creating height and defining the box-like shape.
4: Add the Eyes
- Use the white yarn to create the eyes with a 2mm crochet hook.
- The eyes are made of cross-stitched Xs and a filled rectangle. Start at the front of the head, counting stitches to place the eyes evenly. The eyes consist of 2×4 stitches horizontally, with separation between them.
- Use cross-stitching to fill the outlined eye area while ensuring the stitches create a smooth finish. Once completed, tie off on the inside of the head to secure the threads.
5: Shape the Head
- Lightly stuff the head with polyfill. Begin by forming the middle section and adding extra stuffing to the corners to ensure a square-like appearance. Avoid overstuffing to prevent distortion or visible gaps.
6: Crochet the Body
- Begin the body directly from the decreased head section.
- Crochet eight rounds of single crochet, working in continuous rounds without decreases or increases. After stuffing the body lightly, finish rounds, ensuring the silhouette retains its blocky shape.

7: Create the Arms
- Start with a magic circle and work eight single crochets into the ring.
- Crochet seven rounds to form the tubular shape of the arms, stuffing lightly to avoid unnecessary bulk.
- Close the arms by stitching four single crochets, then fasten off. Repeat for the second arm.
8: Crochet the Wings
- Begin with a chain of 16 stitches using the base yarn, leaving a long tail for sewing.
- Work into the back loops and form various branches by alternating chain lengths (chain six for larger branches, chain three for smaller) and incorporating single crochets, half double crochets, and decreases to create the pixelated look.
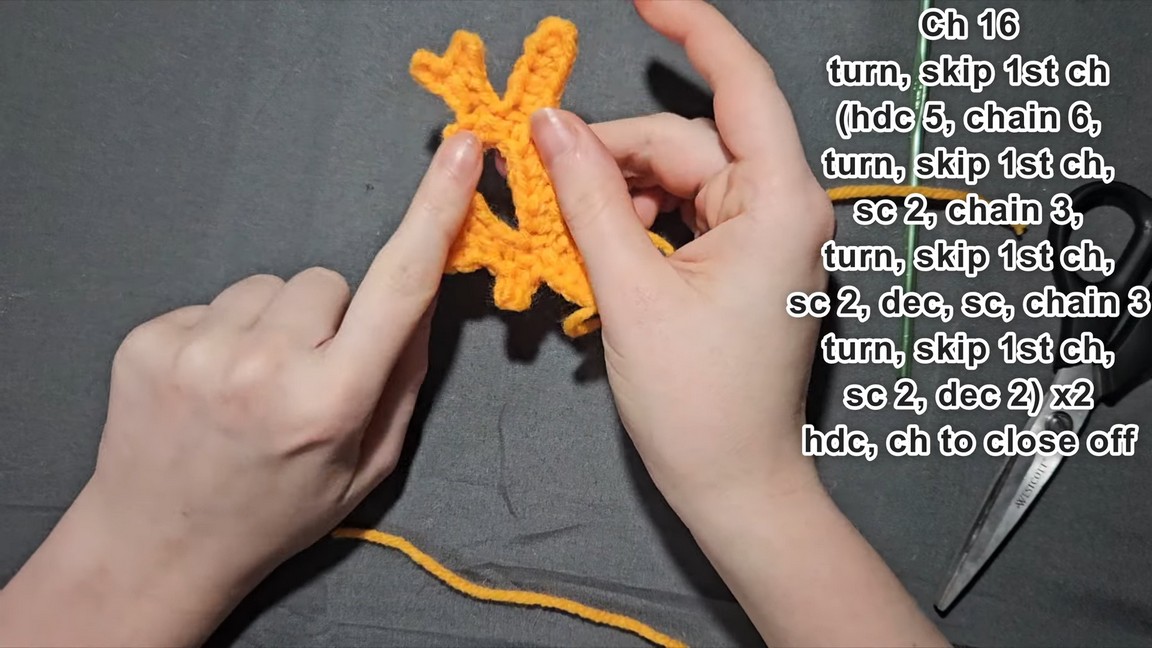
- Repeat the process for the second wing.

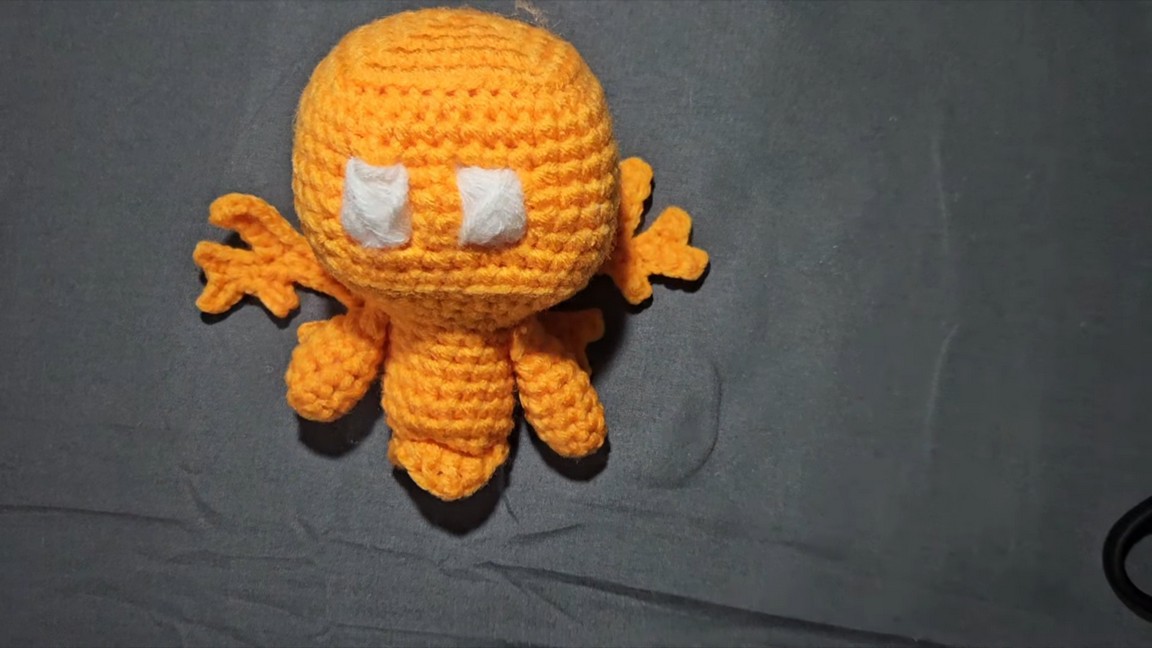
9: Assemble the Allay
- Sew the arms onto both sides of the body using the yarn tails.
- Stitch the wings symmetrically onto the back of the Allay, ensuring alignment for a balanced appearance.
- Add the “ghost swoops” using half double crochet, double crochet, and triple crochet stitches, mimicking Minecraft’s spectral trails.
Special Features
- The Minecraft-inspired design: Mimicking the pixelated nature of Minecraft characters, the Allay has sharp edges and distinct layered detailing, reminiscent of the game’s aesthetic.
- Detailed shaping: The tutorial emphasizes correct corner definition, balancing stuffing, and special techniques (e.g., back loops, triple increases/decreases) to achieve the square look.
- Cross-stitched eyes: The video introduces a method for creating eyes using cross-stitch, which gives a cleaner and smoother finish compared to sewing on crocheted pieces.
- Wings and ghost-like trails: Incorporating chains and subtle crochet decreases lends accuracy to the Minecraft Allay design while remaining lightweight.
Level of Difficulty
The Minecraft Allay pattern is considered beginner to intermediate. While the basic crochet stitches like single crochet, magic circle, and slip stitch are beginner-friendly, techniques like triple increases/decreases and shaping elements may require additional patience and attention for newer crochet enthusiasts.
Tutor’s Suggestions
- Avoid Overstuffing: The creator emphasizes using minimal stuffing to ensure the Allay maintains its square-like shape. Overstuffing can distort the boxy aesthetic and create visible gaps in stitches.
- Focus on Corner Balance: Pay close attention to aligning corners during decreases to maintain symmetry as the pattern progresses.
- Cross-Stitch Eyes for Accuracy: The tutor prefers cross-stitching the eyes directly onto the body rather than crocheting separate pieces to sew on. This technique results in a more authentic finish.
- Take Time with Wings: While the wings may seem intricate, careful counting and deliberate stitching ensure their pixel-inspired style stays consistent.
Uses
- Decorative Piece: The Allay is perfect for Minecraft fans to display in their rooms, on shelves, or as part of themed collections.
- Gift: Crochet an Allay for a Minecraft enthusiast or as a handmade toy for children.
- Interactive Play: Add wire to the wings or body for flexibility and movement to make it an engaging play figure.
- Craft and Learning: Ideal for practicing amigurumi techniques like shaping squares and cross-stitch detailing.
Conclusion
The Minecraft Allay crochet tutorial guides users through creating a simplified yet detailed mini version of the adorable game companion. From forming precise corners to crafting wings and unique eyes, the project is an enjoyable way for crochet enthusiasts to combine creativity and skill. With careful attention to shaping and assembly, you’ll have a beautiful and functional handmade Minecraft character that adds charm to any setting.
Tip
When working with darker yarns or small details (like wings or eyes), ensure you have adequate lighting. This will help reduce strain and improve visibility during intricate stitches!


