Weave nautical elegance with this Crochet Fisherman’s Ring Square Pattern, featuring rich texture, classic charm, and timeless creative flair.
Classy Crochet Fisherman’s Ring Square for Every Crocheter
Stories of coastal life often tell of fishermen mending their nets at dawn, their hands weaving strength and precision into every knot. The Crochet Fisherman’s Ring Square pattern draws from that same spirit—steady, balanced, and filled with quiet purpose. Its structured symmetry and circular flow mirror the enduring rhythm of tides, making it a piece that carries both harmony and history within each stitch.
Materials Needed
- Yarn: Weight 4 cotton yarn (select any color of your preference).
- Hook: 4mm crochet hook is recommended, but you can adjust the hook size for tighter or looser results.
- Scissors: For cutting the yarn ends.
- Optional: Stitch markers for added clarity in sections.

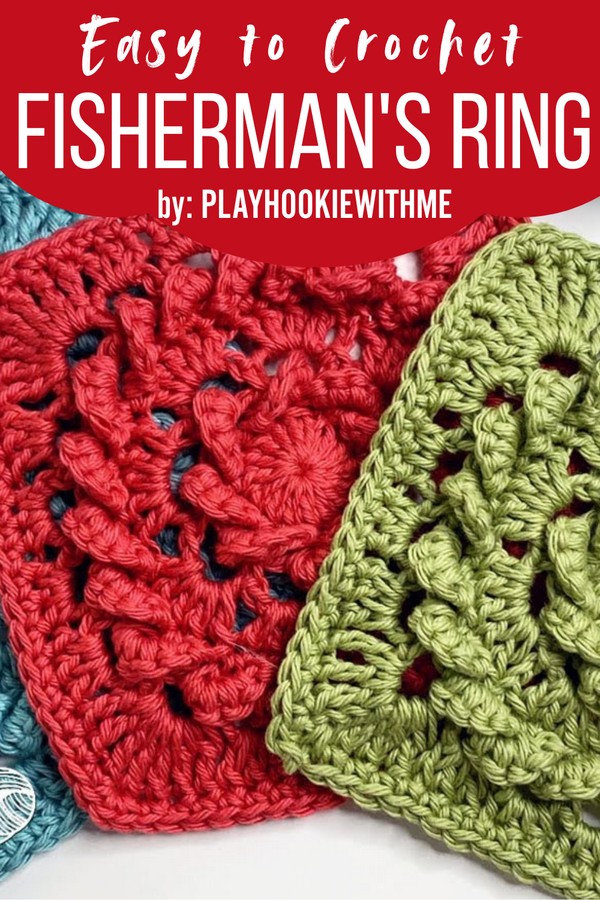
This pattern stands out for its intricate geometric form, where interlocking loops form a captivating center reminiscent of the strength found in maritime knots. Its sturdy yet refined structure makes it ideal for blankets, cushion covers, table runners, or any project that calls for visual depth and elegant symmetry. The circular motif framed by clean lines gives each square a timeless beauty that pairs effortlessly with a variety of color palettes—from calm ocean hues to bold contrasts.
More than just a decorative element, the Crochet Fisherman’s Ring Square symbolizes unity and endurance. Whether used individually or joined together, it adds sophistication and texture to any piece, making it a versatile favorite among those who appreciate thoughtful artistry. Every completed square carries a touch of coastal serenity, bound by patience and the rhythm of tradition.
Step-by-Step Instructions
Step 1: Create the Magic Ring
- Begin with a magic ring by wrapping yarn around your fingers and pulling it through to form a loop. Alternatively, you can chain 5, then join with a slip stitch to form a ring.
- Chain 3, which counts as your first double crochet. Then, crochet 15 double crochets into the ring to complete 16 total stitches (including the initial chain 3).
- Slip stitch into the top of the first chain three to close the round.
Step 2: Round Two – Creating the Cables
- Chain 1 and work a single crochet into the same stitch you slip stitched into.
- Chain 5, skip two stitches, and make a single crochet into the third stitch.
- Turn your work, and crochet 5 single crochets around the chain loop (you can work either into the chains or around them).
- Turn again and secure the cable by working a single crochet into the second skipped stitch (push the cable forward to locate the stitch).
- Repeat: Chain 5, skip one stitch, work a single crochet into the next, then turn and crochet 5 singles around the chain loop. Turn and secure the cable by working into the skipped stitch.
- Continue repeating this process to form 8 cables around the round.

3: Round Three – Securing and Adding Chain Spaces
- Chain 1 and work a single crochet into the first stitch from the previous round.
- Chain 5, securing the new chain below each cable by working a single crochet into the first single crochet beneath the previous cable.
- Repeat the process for each cable, ensuring the new chain sits behind the cable to add stability. Finish by slip stitching into the first single crochet.
4: Round Four – Filling the Chain Spaces
- Slip stitch into the first chain space and chain 3 (this counts as your first double crochet). Then, work 4 double crochets into the same chain space to complete 5 stitches.
- Continue working 5 double crochets into each subsequent chain space around the square, totaling 40 double crochets by the end of this round.
- Slip stitch into the top of the initial chain 3 to close the round.

5: Round Five – Repeating Cable Pattern
- Chain 1 and crochet a single stitch into the first stitch.
- Chain 5, skip two stitches, and place a single crochet into the third stitch.
- Turn, crochet 5 singles around the chain, turn again, and secure the cable with a single crochet into the skipped stitch, as in Round Two.
- After the first cable, only skip one stitch before creating the next. Repeat this process to form 20 cables by the end of the round.
- For the last cable, secure it by working in front of the last cable rather than the usual behind-the-cable method, ensuring the fan design completes symmetrically.
6: Round Six – Adding Chain Loops Again
- Chain 1 and work a single crochet below the first cable.
- Chain 5, then secure the chain below the next cable (push the cable forward to locate the stitch behind).
- Continue repeating this process for all 20 cables. On the very last chain loop, instead of chaining 5, work chain 2 followed by a double crochet into the first single crochet to bring your hook into the middle of the chain space, setting up for the corner formation in the next round.

7: Round Seven – Building the Square’s Shape
- Begin creating corners with treble crochet. Chain 4 for the first treble, then work 3 more treble crochets into the same corner space.
- Move to the next chain space. Work 3 double crochets, and into the next two chain spaces, work 3 half-double crochets each (instead of singles—this prevents dips in the pattern).
- As you approach the next corner, work back up with 3 double crochets, followed by 7 treble crochets into the corner space.
- Repeat the sequence for all sides: Corners (7 treble crochets each) → Double → Half-double → Half-double → Double. Finish by slip-stitching into the top of the first treble crochet.

8: Final Round – Single Crochet Border
- Work 3 single crochets in each corner space, then crochet 18 single crochets along each side, ensuring the middle corner stitch gets the extra single crochets.
- Continue around the square until the border is complete. Fasten off and weave in the ends to finish your Fisherman’s Ring Square.

Special Features
- Intricate Look, Simple Execution: Despite its highly textured and detailed appearance, the repetitive cable and double crochet pattern make this granny square much easier to complete than it looks.
- Customizable Design: You can adjust the chain count in the cable sections (changing Chain 5 to Chain 4 for a tighter look) or switch hook sizes to change the overall dimensions and appearance.
- Cables Technique: This project teaches a distinctive method of crafting and securing cable stitches within textured crochet, perfect for enhancing your skill set.
Level of Difficulty
The Fisherman’s Ring Square is suitable for advanced beginners to intermediate crocheters. Basic familiarity with double crochets, single crochets, treble crochets, and chain spaces is essential. Those new to cables may need extra time to grasp how to work and secure them, but with practice, the pattern becomes easy to memorize.
Tutor’s Suggestions
- Work Slowly: Pay close attention when forming cables and turning your work to ensure everything is neat and smooth.
- Counting Stitches: Regularly double-check your stitch count as you complete each round, especially the total number of cables (8 in Round 2 and 20 in Round 5) and chain spaces to avoid losing track.
- Condensing the Design: If you find the chain 5 spaces too loose or “gapy,” you can substitute with chain 4 or downsize your crochet hook to tighten up the design.
Uses
- Blankets and Throws: The Fisherman’s Ring Square adds a stunning textured look to patchwork blankets.
- Cushions: Use multiple squares to create decorative pillow covers.
- Scarf or Wrap: Join squares to create a statement heating accessory.
- Wall Hanging: Assemble these squares as unique decorations for walls and showcase your crochet skills!
Conclusion
The Fisherman’s Ring Square Crochet Tutorial combines aesthetics with simplicity to create a mesmerizing design that is sure to impress others. Perfect for use in blankets, garments, or crafts, this square teaches the cables technique and enhances your crochet skillset with new textures and designs. Whether you’re a beginner seeking a fun challenge or an experienced crocheter looking for an eye-catching pattern, this tutorial is easy to work on while allowing room for customization.
Tip
It’s easier to count your cables and chain spaces from the back side of your project to ensure accuracy. For a cleaner square with tighter stitches, experiment with smaller hook sizes or replacing chain 5s with chain 4s.


