Ignite scientific creativity with this Crochet Conical Flask Pattern, perfect for quirky décor, unique gifts, and playful handmade fun.
Eye-Catching Crochet Conical Flask Pattern for Science Fans
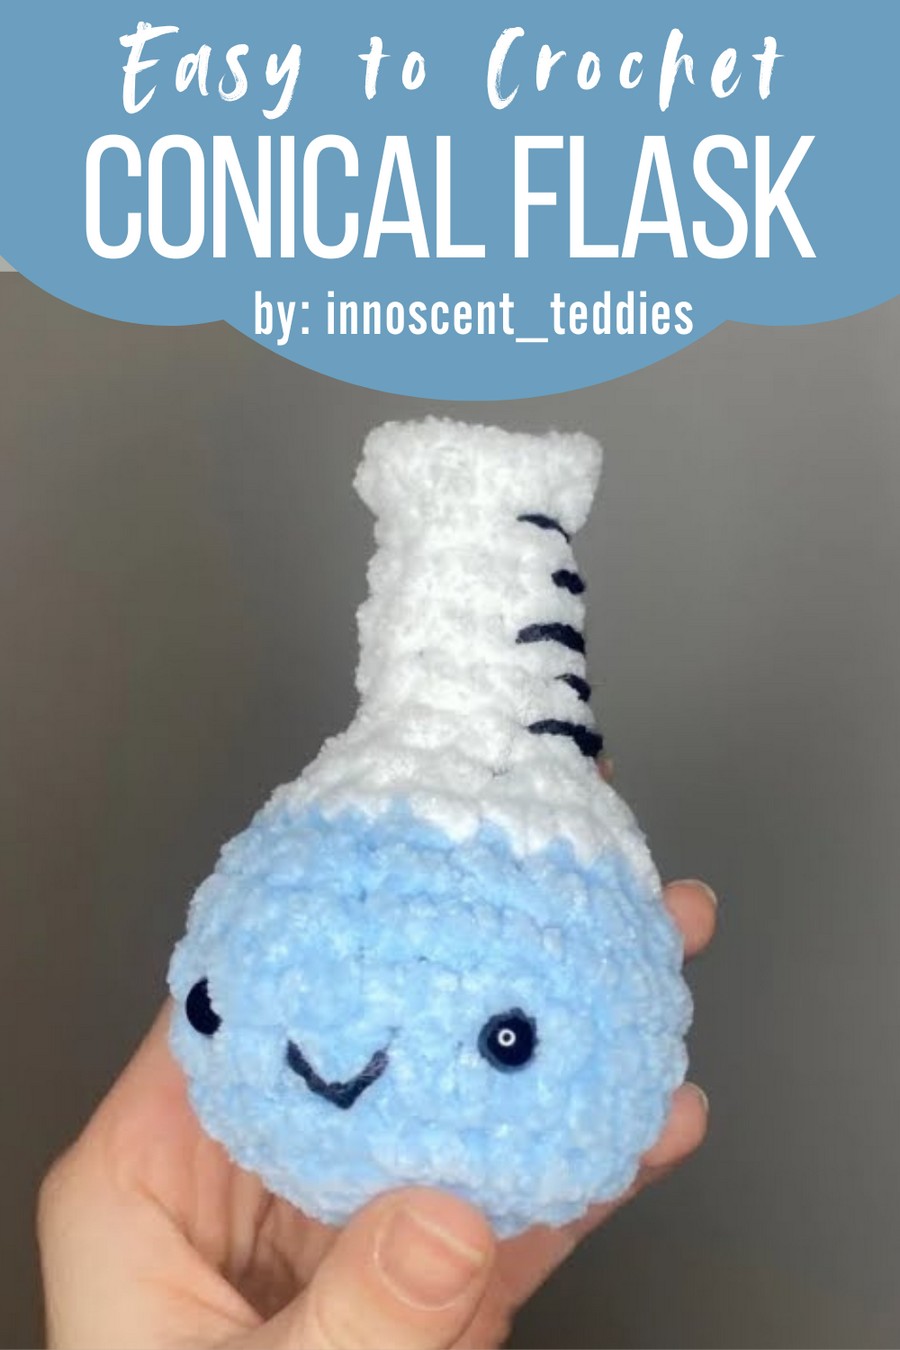
A simple object from a laboratory can inspire curiosity and creativity when reimagined in a playful form. This crochet conical flask captures the familiar shape of a scientific classic. Its compact size makes it ideal as a whimsical accent, a fun educational tool, or a unique gift for students, teachers, or science enthusiasts. The soft, rounded base and tapering neck echo the iconic silhouette of the flask, offering a tactile and visually appealing miniature that sparks both interest and conversation.
Step-by-Step Details
Materials Needed:
- Two yarn colors (one for the flask itself and one for the “liquid”).
- Stuffing: To give the project its shape.
- Crochet Hook: Nikki used a 4mm hook, but you’re free to use any size you prefer.
- Scissors: For cutting yarn.
- Yarn Needle: For weaving in ends and sewing details.
- Stitch Marker: To keep track of your stitches.
- Safety Eyes (7mm): Used for the flask’s “face” (optional).
- Black Acrylic Yarn: For the details like the mouth and measuring lines.
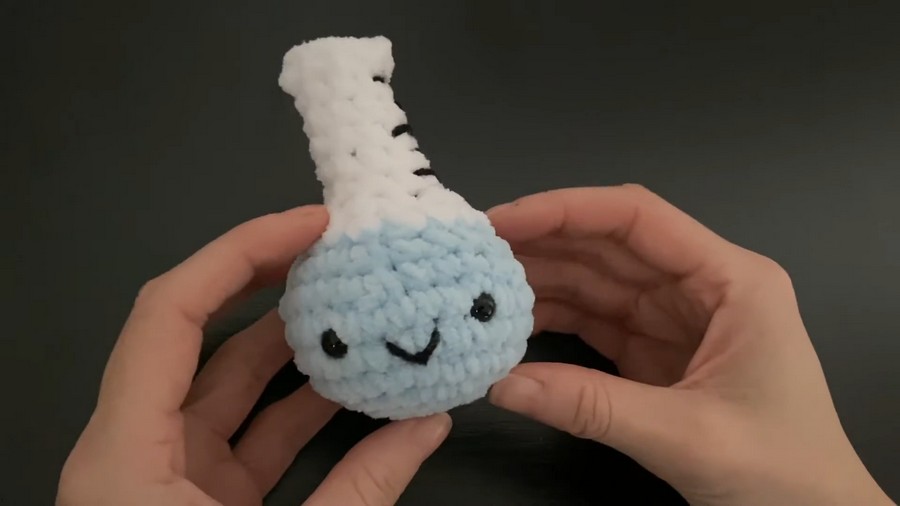
The piece stands out through careful shaping and subtle detailing. Its smooth body and balanced proportions ensure a polished and recognizable form, while color variations or small embellishments allow for creative expression without complicating the construction. Lightweight and durable, it can be displayed individually or grouped with other miniatures, creating a playful and engaging arrangement.
Step-by-Step Process:
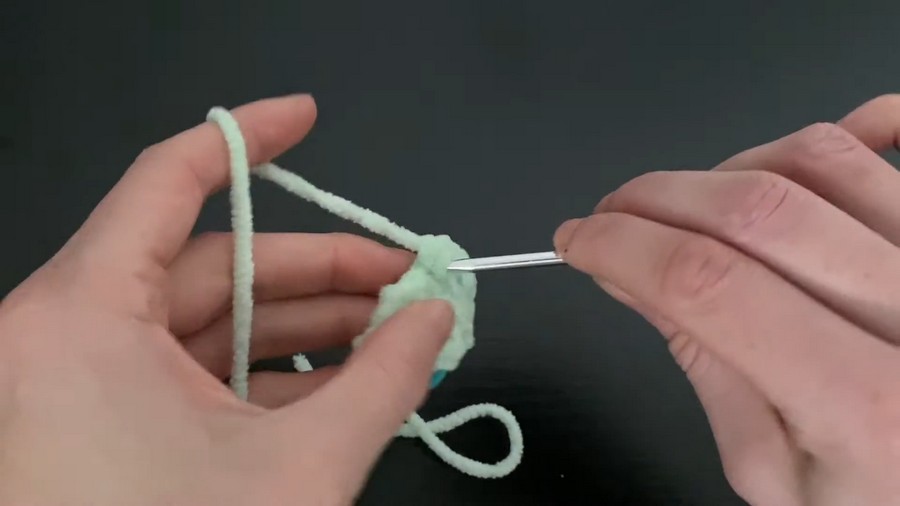
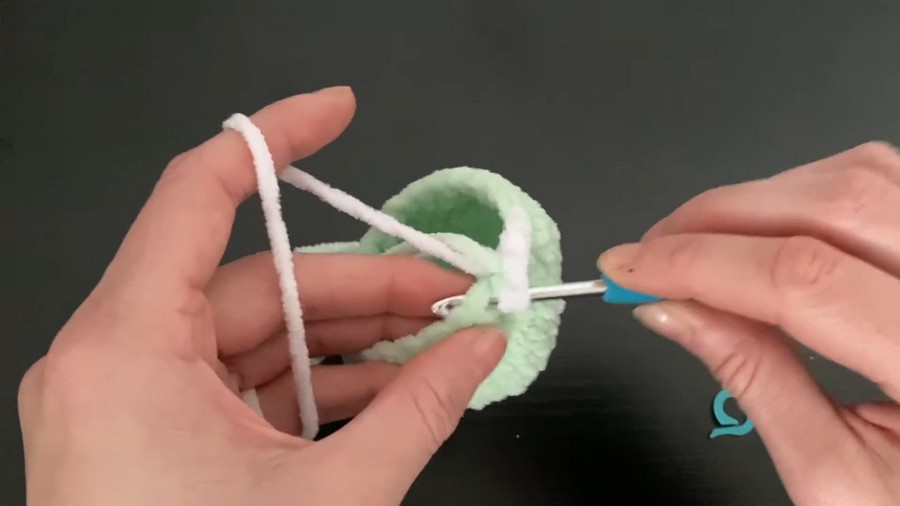
- Round 1 – Magic Ring:
- Start with 6 single crochets in a magic ring. If preferred, you can use the chain-2 method instead.
- 2:
- Increase in each stitch (single crochet twice in each stitch).
- At the end, you should have 12 stitches.
- 3:
- Perform one single crochet and an increase alternately across all stitches.
- At the end, there will be 18 stitches.
- 4:
- Perform two single crochets and an increase alternately.
- End with 24 stitches.
- 5:
- Perform three single crochets and an increase alternately across the round.
- Finish with 30 stitches.
- 6-8:
- Single crochet around (no increases) for three rounds to maintain 30 stitches.
- By the end of round 8, your work will have a dome-like shape.
- 9:
- Three single crochets and an invisible decrease (a technique to reduce stitch count gradually).
- Stitch count reduces back to 24.
- Change yarn color to white when finishing this round.
- 10:
- Two single crochets and an invisible decrease alternately around.
- Cut the original yarn (green in the video) and hide the tails within the flask.
- Adding Safety Eyes:
- Place safety eyes around rows 6-7, approximately seven stitches apart. Adjust placement for a quirky or cute look.
- Stuffing the Base:
- Stuff the dome to give it rounded shape. Adjust firmness based on preference.
- 11:
- Perform one single crochet and decrease six times to reduce the count to 12.
- 12-17:
- Single crochet around the 12 stitches for six rounds to form the “spout.”
- 18:
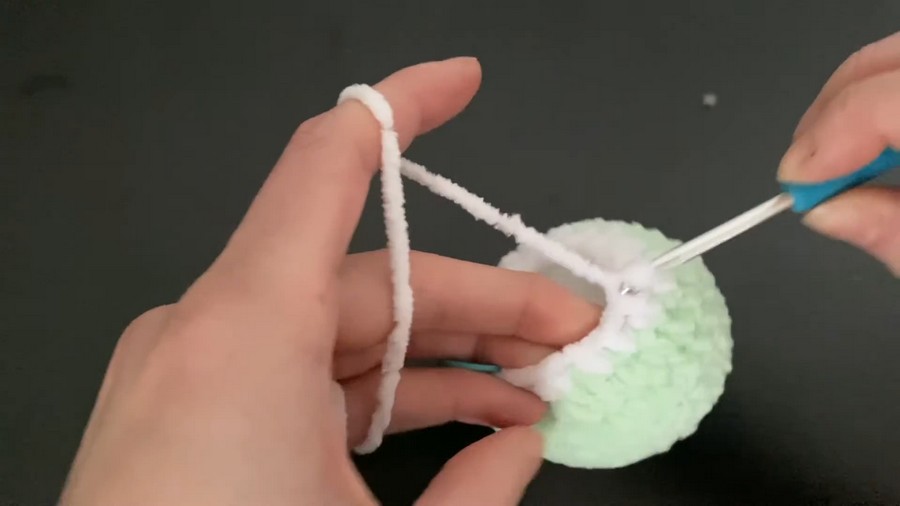
- Perform six decreases in the back loops only to close the spout of the flask and form its flat top.
- Leave a yarn tail for sewing, then seal the last hole with the tail.
- Adding the Lip (Optional):
- In the front loops of the last round, add a decorative “lip” to the top of the flask:
- Perform six single crochets and an increase two times around the spout.
- In the front loops of the last round, add a decorative “lip” to the top of the flask:
- Adding Details:
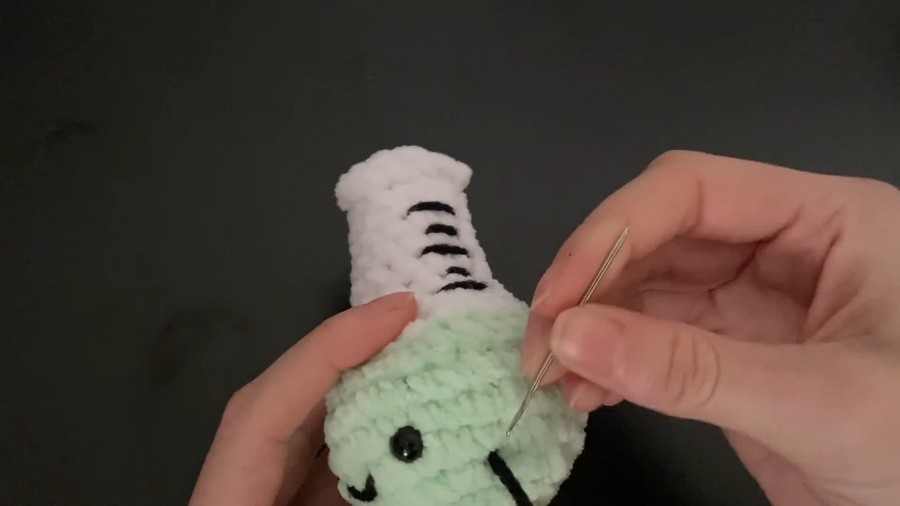
- Use black acrylic yarn to embroider the mouth in a simple smile between the safety eyes.
- Use a needle to sew optional measuring lines on the spout. These lines can alternate between long and short, creating the appearance of measurement markers on the flask.
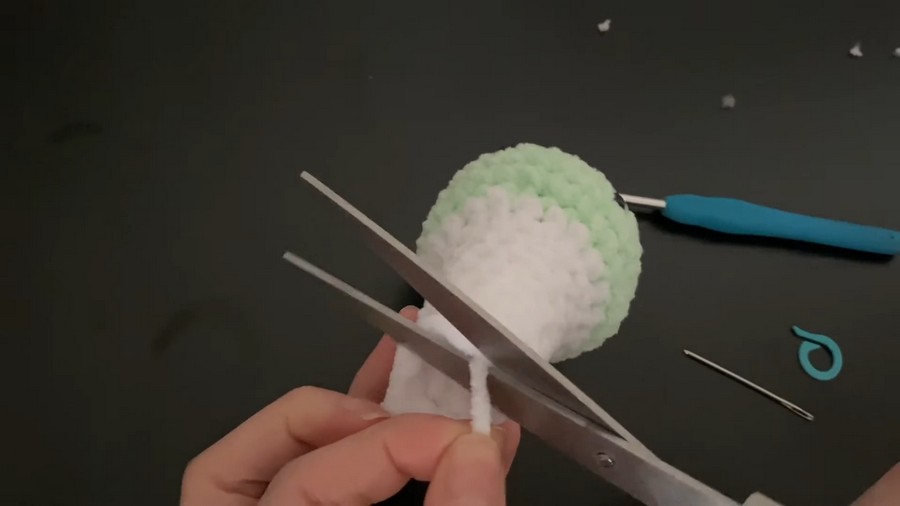
- Finishing Touches:
- Hide all loose yarn tails inside the flask.
Special Features
- Customizable Appearance: You can choose any combination of colors for the flask and its interior “liquid.”
- Adorable Details: The smile, safety eyes, and measurement lines add character, making the flask fun and whimsical.
- Quick Project: The pattern is beginner-friendly and doesn’t take much time to complete.
Level of Difficulty
The project is beginner-friendly, since creator avoids complex techniques and sticks to simple stitches like single crochets, increases, and invisible decreases. Beginners can follow along easily, and creator recommends slowing down the playback speed for additional help.
Tutor’s Suggestions
- Feel free to modify the spout’s length (Rounds 12-17). You can add or reduce rows depending on your preference.
- Don’t stress over the details—placement of safety eyes, mouth shape, and measuring lines can vary. It’s a creative project, so enjoy experimenting.
- Beginner tip: If the yarn tangles or feels tight, take breaks and untangle carefully.
Uses and Applications
- Gifts: Perfect as a personalized handmade gift for teachers, science enthusiasts, or collectors.
- Decor: Works wonderfully as desk or shelf decor, adding a touch of personality.
- Crochet Markets: Ideal for selling at markets due to its quick creation time, versatility, and charm.
Tip
Pay attention to stitch count to ensure the flask shape stays consistent. Using a stitch marker is crucial for round-to-round accuracy. Don’t skip the stuffing step, as it provides the conical flask with its signature shape.
Conclusion
Crocheting this adorable conical flask is a fun, quick, and creative project that is ideal for beginners and experienced crocheters alike. With its customizable design, it’s perfect for gifting, decorating, or selling. creator engaging pattern makes the process straightforward and enjoyable, offering flexibility in technique and design.


