Bloom creativity with this Crochet Rose Flower Pattern, perfect for elegant décor, thoughtful gifts, and charming handmade artistry.
Elegant Crochet Rose Flower Pattern That Blooms with Charm

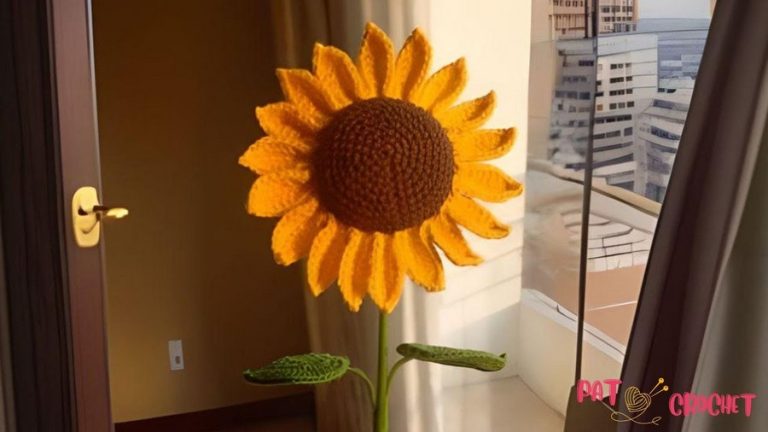
A single bloom can transform a space, and a carefully crocheted rose carries beauty that lasts far beyond a fleeting moment. This crochet rose flower brings the elegance of nature into any setting, offering a touch of charm and sophistication without the need for water or sunlight. Perfect as a decorative accent, a gift, or part of a handmade bouquet, it adds warmth and personality to homes, offices, or personal collections. Its soft, layered petals capture the gentle curves and depth of a real rose, making it a versatile piece that delights both the eye and the heart.
Materials
For this project, you will need:
- Yarn: DK weight yarn in the color of your choice (e.g., Stylecraft Special DK in “Fondant” is used in the tutorial).
- Crochet hook: A 3.5mm hook for standard-sized roses. However, larger hooks (e.g., 5.5mm) and chunky yarn can be used for oversized roses.
- Scissors: For cutting yarn at different stages.
- Darning needle: To sew the rose together at the end.

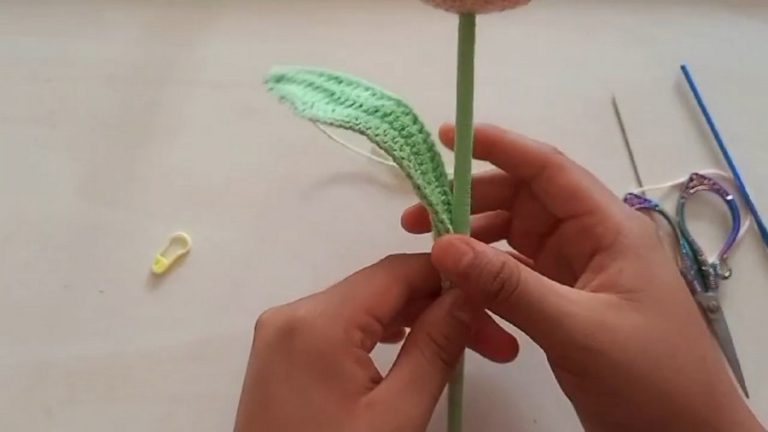
The flower stands out for its graceful structure and detailed shaping. Each petal flows naturally from the center, creating a balanced, three-dimensional form that holds its shape beautifully. Lightweight and durable, it can be attached to hair accessories, brooches, or home décor elements, allowing for endless creative applications.
The process is approachable yet rewarding, offering makers a sense of calm focus and accomplishment as they bring each petal to life.Beyond its aesthetic appeal, this crochet rose symbolizes care and thoughtfulness, making it ideal for meaningful gifts or personal keepsakes.

Step-by-Step Guide
Step 2: Start the Base Chain
- Begin with a slip knot and attach the yarn to your hook.
- Create a chain of 49 stitches. This will act as the base for the rose structure.

Step 3: Row 1 – Base Layer
- Work double crochet stitches (UK terminology, single crochet in US terms) along the chain:
- Start in the second chain from the hook (not the first one closest to the hook).
- Insert your hook, grab the yarn, pull through, and complete the stitch.
- Crochet into each chain until you reach the end of the row. You should have 48 stitches in total.
4: Row 2 – Forming Petals
- Chain 1 and turn the work. Work along the row to start forming petals.
- Skip the first stitch and begin working into the second stitch.
- Insert UK trebles (US doubles) into the second stitch:
- Yarn over, insert the hook, pull through, and complete the treble stitch.
- Repeat this until you have 5 trebles in the same stitch (the petal base).
- Chain 1, skip the next stitch, and make a slip stitch into the following stitch. This completes your 1st petal.
- Repeat the process twice more (for a total of 3 small petals with 5 trebles each).

5: Increase Petal Size
- After completing 3 small petals, move to the next group of petals:
- Chain 1, skip the next stitch, and work 7 trebles in the following stitch.
- Continue with chain 1, skip a stitch, and slip stitch into the next stitch to complete the petal.
- Repeat this process to create 3 medium petals (using 7 trebles each).
6: Large Petals
- Now it’s time to increase the petal size again:
- Chain 1, skip one stitch, and work 9 trebles in the next stitch.
- Follow this pattern for 3 large petals (using 9 trebles each).

7: Extra-Large Petals
- Continue enlarging the petals:
- Chain 1, skip one stitch, and work 11 trebles in the next stitch.
- Repeat this process to create 3 extra-large petals.
- You should now have a total of 12 petals: 3 small, 3 medium, 3 large, and 3 extra-large.
8: Finish the Edges
- After completing the final petal, chain 1, skip a stitch, and make a slip stitch in the last stitch.
- Cut the yarn, leaving a long tail to assemble the rose later.
9: Assemble the Rose
- Lay the crocheted strip flat with the right side facing you.
- Roll the rose tightly, starting from the smaller petals:
- Begin curling the smaller petals inward to form the rose’s center.
- Continue rolling outward, wrapping the medium, large, and extra-large petals around the center.
- Keep the base aligned while rolling to maintain a cohesive structure.
10: Sew the Rose Together
- Use the yarn tail and the darning needle to attach all the layers securely:
- Start from the back and sew across the layers.
- Work up and down through each layer to secure the petals.
- Keep sewing until the rose feels tightly secured.
- Knot off the tail ends and trim excess yarn.

Special Features
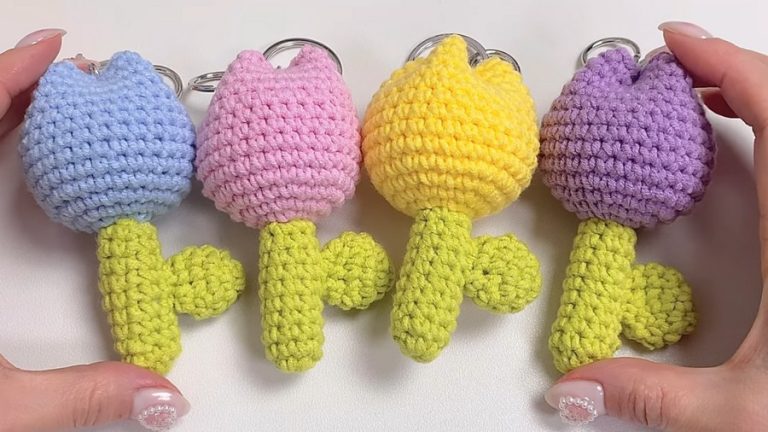
- Customizable Sizes: You can easily adjust the size of the roses by changing the hook and yarn size. Chunky yarn combined with multiple strands creates oversized roses, while finer yarns create delicate roses.
- Versatile Uses: These roses can be used to embellish hats, clothing, wreaths, or turned into brooches by attaching a pin with added leaves.
- Quick and Easy Pattern: With a simple two-row structure and repeating petal sizes, this is a beginner-friendly design that produces stunning results quickly.
Level of Difficulty
This pattern is suitable for beginners, but some parts might feel fiddly—especially for first-time crocheters, such as rolling the rose and sewing the layers together. The steps themselves use basic stitches like chain, double crochet (UK)/single crochet (US), and trebles (UK)/doubles (US), which are accessible to new learners.
Tutor’s Suggestions
- For Larger Roses: Use chunky yarn or combine two strands of yarn with a larger hook (e.g., 5.5mm).
- For Smaller Roses: Use finer yarn like cotton and a smaller hook (e.g., 2.5mm or 3mm). Cotton yarn is easier to work with in smaller sizes and creates a neat finish.
- Take your time while rolling the rose—practice makes perfect! The more roses you create, the easier this step will become.
Uses
- Gifts: Attach the roses to cards, gift wrap, or turn them into brooches for loved ones.
- Home Décor: Add them to wreaths, vases, or table centerpieces.
- Clothing Accessories: Sew them onto hats, scarves, or tops for decorative flair.
- Stash-Busting: Use leftover bits of yarn from old projects to create colorful roses.
Pro Tip
To make assembling the rose easier, ensure that you keep the stitches aligned at the base while curling the petals. If the curling becomes difficult, gently cinch the petals inwards as you roll to help the rose take shape naturally.
Conclusion
This crocheted rose pattern is a quick, beginner-friendly project that beautifully combines simplicity and creativity. Whether you use them for decorations, stash-busting, or gifting, these roses can be easily tailored to your needs using different yarns and hooks. With practice, even fiddly sections like assembling the petals will become second nature.