Immerse yourself in the Free crochet Colorful Dragon Pattern to crochet a vibrant dragon perfect for gifts, home décor, or playful kids’ toys.

Charming Crochet Colorful Dragon Pattern for Gifts & Décor
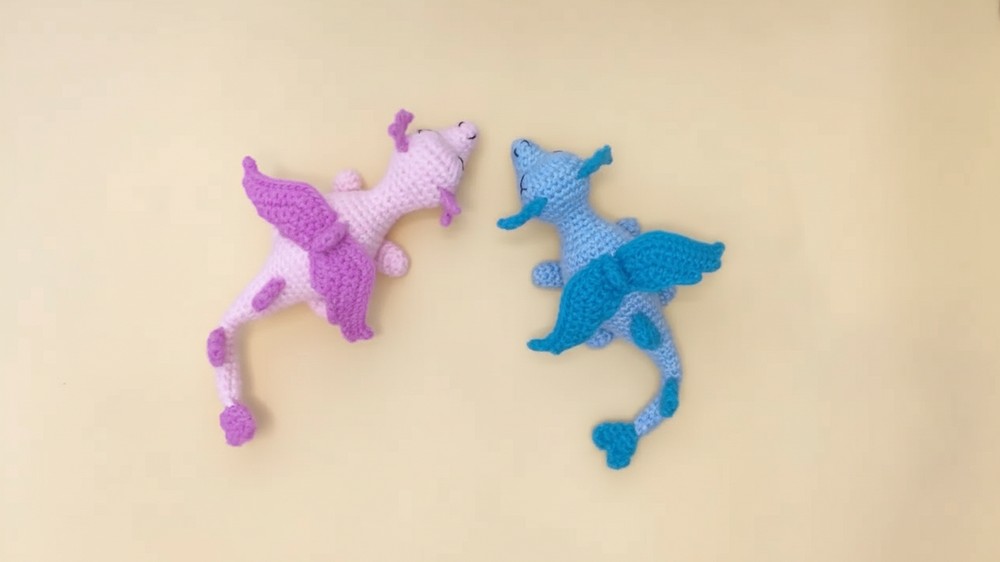
A colorful dragon crochet project offers a unique opportunity to explore the imaginative world of mythical creatures through the art of crochet. This pattern guides you in creating a whimsical, vibrant dragon complete with intricate wings, a detailed tail, and a textured body. Perfect for both beginners and experienced crocheters, the project challenges your skills while resulting in a captivating and playful creation.
Beyond its aesthetic appeal, a crocheted dragon is incredibly versatile. It can be customized with different colors and features to suit any theme, making it a perfect gift, a charming piece of home décor, or an enchanting toy for a child. As you work through the pattern, you’ll refine your crochet techniques, including shaping, color transitions, and assembly, all while enjoying a relaxing and rewarding experience.
Materials You Will Need
To create the crocheted dragon, ensure you have the following materials ready:
- Yarn
- Use two colors: Color #1 for the dragon’s body/legs and Color #2 for details like wings and ears.
- Choose soft, non-elastic yarn for better structure.
- Crochet Hook
- Use a size compatible with your yarn (e.g., 2.5mm or 3mm).
- Stitch Markers
- These are essential to mark starting points in your rounds.
- Scissors
- For neat and precise cutting of yarn.
- Tapestry Needle
- For sewing pieces together and weaving in ends.
- Fiber Fill or Cotton Stuffing
- To give your dragon a plush look.
- Wire
- Used in the wings and legs for added structure and bendability.
The ability to personalize your dragon adds another level of creativity. You can incorporate wired wings, unique stitch patterns, or decorative details to make it truly one-of-a-kind. Whether designed as part of a themed display, a storytelling piece, or a treasured gift, a colorful crocheted dragon is filled with artistic possibilities and is an ideal way to combine creativity with skill development.

Crochet Colorful Dragon
Body (using color #1 yarn)
- Round 1: Create a magic circle with six single crochet stitches.
- Round 2: Hook a chain stitch, then three sets of a single crochet and an increase stitch, finishing with a slip stitch for a total of nine stitches.
- Round 3: Hook a chain stitch, followed by nine single crochet stitches and a slip stitch to finish, maintaining nine stitches.
- Round 4: Hook a chain stitch, then three sets of a single crochet, an increase stitch, and another single crochet. End with a slip stitch for a total of 12 stitches.
- Round 5: Hook a chain stitch, followed by 12 single crochet stitches and a slip stitch, for a total of 12 stitches.
- Round 6: Hook a chain stitch, followed by six sets of a single crochet and an increase stitch, and a slip stitch to finish for a total of 18 stitches.
- Round 7: Hook a chain stitch, then seven single crochet stitches. The next four stitches are a group of three double crochet hooks in the same stitch. Finally, hook seven single crochet stitches and a slip stitch.
-
Rounds 8-10:
Each round consists of a chain stitch, 26 single crochet stitches, and a slip stitch to finish, totaling 26 stitches.
- Round 11: Hook a chain stitch, five single crochet stitches, four sets of a single crochet, a decrease stitch, and another single crochet. Finish with five more single crochet stitches and a slip stitch, resulting in 20 stitches.
- Round 12: Hook a chain stitch, five single crochet stitches, four sets of a decrease stitch, and another single crochet. Finish with five more single crochet stitches and a slip stitch, for a total of 16 stitches.
- Round 13: Hook a chain stitch, then six sets of a single crochet and a decrease stitch, finishing with a slip stitch for a total of 12 stitches. This is where you add the filler cotton.
- Rounds 14-16: Each round includes a chain stitch, 12 single crochet stitches, and a slip stitch for a total of 12 stitches. Add filler cotton again at the end of round 16.
- Round 17: Hook a chain stitch, three single crochet stitches, three sets of a single crochet and an increase stitch, and three more single crochet stitches. End with a slip stitch for a total of 15 stitches.
- Round 18: Hook a chain stitch, three single crochet stitches, three sets of a single crochet, an increase stitch, and another single crochet, followed by three more single crochet stitches. End with a slip stitch for a total of 18 stitches.
- Round 19: Hook a chain stitch, followed by six sets of a single crochet, an increase stitch, and another single crochet. Finish with a slip stitch for a total of 24 stitches.
- Round 20: Hook a chain stitch, 24 single crochet stitches, and a slip stitch to finish, for a total of 24 stitches.
- Round 21: Hook a chain stitch, six sets of three single crochet and one increase stitch, and a slip stitch to finish for a total of 30 stitches.
-
Rounds 22-28:
Each round includes a chain stitch, 30 single crochet stitches, and a slip stitch to finish, for a total of 30 stitches.
- Round 29: Hook a chain stitch, six sets of a decrease stitch and three single crochet stitches. End with a slip stitch for a total of 24 stitches.
- Round 30: Hook a chain stitch, three sets of a decrease stitch and six single crochet stitches, followed by a slip stitch for a total of 21 stitches.
- Round 31: Hook a chain stitch, three sets of a decrease stitch and five single crochet stitches, followed by a slip stitch for a total of 18 stitches.
- Round 32: Hook a chain stitch, three sets of a decrease stitch and four single crochet stitches, followed by a slip stitch for a total of 15 stitches.
-
Rounds 33-34:
Each round consists of a chain stitch, 15 single crochet stitches, and a slip stitch, for a total of 15 stitches. Add filler cotton again at the end of round 34.
- Round 35: Hook a chain stitch, three sets of a decrease stitch and three single crochet stitches, followed by a slip stitch for a total of 12 stitches.
-
Rounds 36-37:
Each round consists of a chain stitch, 12 single crochet stitches, and a slip stitch for a total of 12 stitches. Add filler cotton again at the end of round 37.
- Round 38: Hook a chain stitch, three sets of a decrease stitch and two single crochet stitches, followed by a slip stitch for a total of nine stitches.
- Round 39: Hook a chain stitch, nine single crochet stitches, and a slip stitch for a total of nine stitches.
- Round 40: Hook a chain stitch, three sets of a decrease stitch and a single crochet, followed by a slip stitch for a total of six stitches.
- Rounds 41-48: Each round consists of a chain stitch, six single crochet stitches, and a slip stitch for a total of six stitches. Add wire for a flexible neck and tail at the end of round 48.
- Round 49: Hook a chain stitch, two sets of a single crochet and a decrease stitch, followed by a slip stitch for a total of three stitches. Finish the body by tightening the thread to close the mouth.


Legs (hook four of them with color #1 yarn)
- Round 1: Create a magic circle with six single crochet stitches and finish with a slip stitch.
- Round 2: Hook a chain stitch, then two sets of two single crochet and one increase stitch. Finish with a slip stitch for a total of eight stitches.
- Round 3: Hook a chain stitch, eight single crochet stitches, and a slip stitch.
- Round 4: Hook a chain stitch, six single crochet stitches, and a decrease stitch. Finish with a slip stitch for a total of seven stitches.
- Round 5: Hook a chain stitch, five single crochet stitches, and a decrease stitch, for a total of six stitches.
- Round 6: Fold the fabric in half and hook three single crochet stitches through both symmetrical pins at the same time. Finish with a slip stitch and leave a long thread for stitching.
Back (hook three of them with color #2 yarn)
- Round 1: Create a magic circle with six single crochet stitches and a slip stitch to finish.
- Round 2: Hook a chain stitch, then two sets of two single crochet and one increase stitch. Finish with a slip stitch for a total of eight stitches.
- Round 3: Hook a chain stitch, fold the fabric in half, and hook four single crochet stitches through two symmetrical stitches at the same time. End with a slip stitch and leave a long thread for stitching.

Ears (hook two of them with color #1 yarn)
- Round 1: Hook five chain stitches. Turn and hook four slip stitches, starting with the second-to-last chain stitch.
- Round 2: Hook a chain stitch, flip the fabric, and hook two single crochet stitches, picking only the half-stitch from the previous round.
- Round 3: Hook three chain stitches. Turn and hook four slip stitches, starting with the second-to-last chain stitch.
- Round 4: Hook a chain stitch, flip the fabric, and hook
Special Features of This Dragon Crochet Project
- Colorful Wings: Each wing is crafted to resemble feather-like elegance using specific shaping techniques.
- Movable Limbs: Adding wire to the dragon’s legs allows flexibility and customization for posing.
- Structured Body: The magic circle and filler cotton result in a compact and neat main body.
- Detailed Accessories: The project includes ears, legs, and wings, enhancing the dragon’s charm.
- Creative Options: You can experiment with colors and patterns to personalize your dragon.
Tutor’s Suggestions
- Practice Basic Techniques First: Magic circle, single crochet, and increase stitches are fundamental to this project. Ensure you master them before moving on.
- Use Stitch Markers: Keeping track of your rounds and stitches will simplify your work.
- Take Your Time: This dragon contains many parts, which may require patience, especially for assembly.
- Double-Check Patterns: Follow the video tutorial closely, as small errors in stitch count could affect symmetry.
- Combine Creativity with the Pattern: While the instructions are precise, experiment with colors and filler materials for personalization.
Uses for the Crocheted Flying Dragon
- Handmade Gift: Delight loved ones with a unique and whimsical gift.
- Decorative Item: Showcase your dragon on shelves or desks.
- Bag Charm: Add a keychain loop to use it as a playful accessory.
- Custom Collectibles: Create multiple dragons in various sizes and colors for your own collection.
Conclusion
Crocheting this flying dragon is a creative, enjoyable process that challenges your crochet skills while offering fantastic results. With its colorful wings, movable limbs, and intricate details, this project celebrates both artistry and craftsmanship.
Final Tip
Plan and organize before you crochet: Lay out materials, estimate the time required for each part, and follow the tutorial step-by-step without skipping sections. Patience and preparation will help achieve perfection!